Saturday, October 24, 2015

Craft (Room) Wall

It seems over the years my craft room has been shrinking! haha This one is on one wall but it is very efficient for my crafting style. I designed it this way so that we could have a family dining room. I also did not want upper cabinets so that I can clutter the wall with eclectic things.
My room is also nicely stocked thanks to the love and friendship from my fellow crafty friends.  Thank you so much for helping me get re-established with my crafting, you all have touched my heart over and over!!!

THE CRAFTROOM

As you look into the room from the kitchen.  A bench is on the right and you can't see but the door to the garage and washer and dryer are on the left side.  This room is actually a mudroom, laundry room and craft room. We also store and feed all 4 dogs and a cat from this room, pretty busy in this tiny space. lol


I purchased these 2 bins at Target and they came with the white jars, perfect storage for quick grabbing of items.


Here is the Prima box I made and 2 decorative jars from a home decor store in Rapid City. Just had to have some pretty to go with function.


Michael store had a great sale so I could display my beloved pocket letters from friends and some cards too.


Pier 1 is where this 2 tiered tray comes from, originally intended for the kitchen but it worked better here.  I have the most used accessory stamps on top and tools on the bottom.  My favorite new tool is the Spellbinders pick with the foam pad, wow it cleans those die cuts with out ripping the papers up. Love it my friend!


Also from Target is this file box perfect for my papers, yes this is all I am allowing myself to have, all my papers are in here in all sizes, I have learned to not covet and hoard, lol a hard lesson but I feel better about it. So anyways, one of my friends gave me the doily stickers and so I adorned my box with them, I love doilies. I told you I am so blessed with gifts from my friends. 


The left side of the cabinet drawers are a over indulgent Prima order I made. I love their flowers and the chipboard that goes on anything, mixed media, pocket letters, cards, so fun and versatile, this will last me a year probably. lol


My embellish drawer with some dividers from things I used in the apartment for other storage. I have a lot of sunlight in this area of my room, cheery


My flowers from other places are sorted here 


My most used ribbons are in the bottom drawer


I have 2 huge deep drawers for die cuts


Inside the die cut drawer are magnets along the inside drawer edges and the Go-Create dies fit perfectly there.


The bin from Micheals holds the smaller dies by theme. Here is a open bin from the overall storage container.  Those tiny squares hold already cut dies that I can use in the future.


the deep bottom drawer holds stamps, and some of my creations so the cat doesn't eat them.  I used metal bins from Micheals, yes they had a great sale that day, lol. I love flipping through them so I can see what I have, otherwise I won't use them.


On the right side are drawers I use for specific themes, like this one is all mixed media embellishing.  Because of the generous gift from 2 crafters I have the rest in a kitchen cabinet, I will be getting into mixed media more in the winter months as my life calms down. My heart is so full from you ladies.


Here is my pocket letter drawer. I have PL I received in the left side box and on the right are ones that I am working on. A few embellishments in the front.


This drawer is for finished cards, scrap paper or images that are stamped but not colored.


The top drawer is the main ingredients to everything I do.


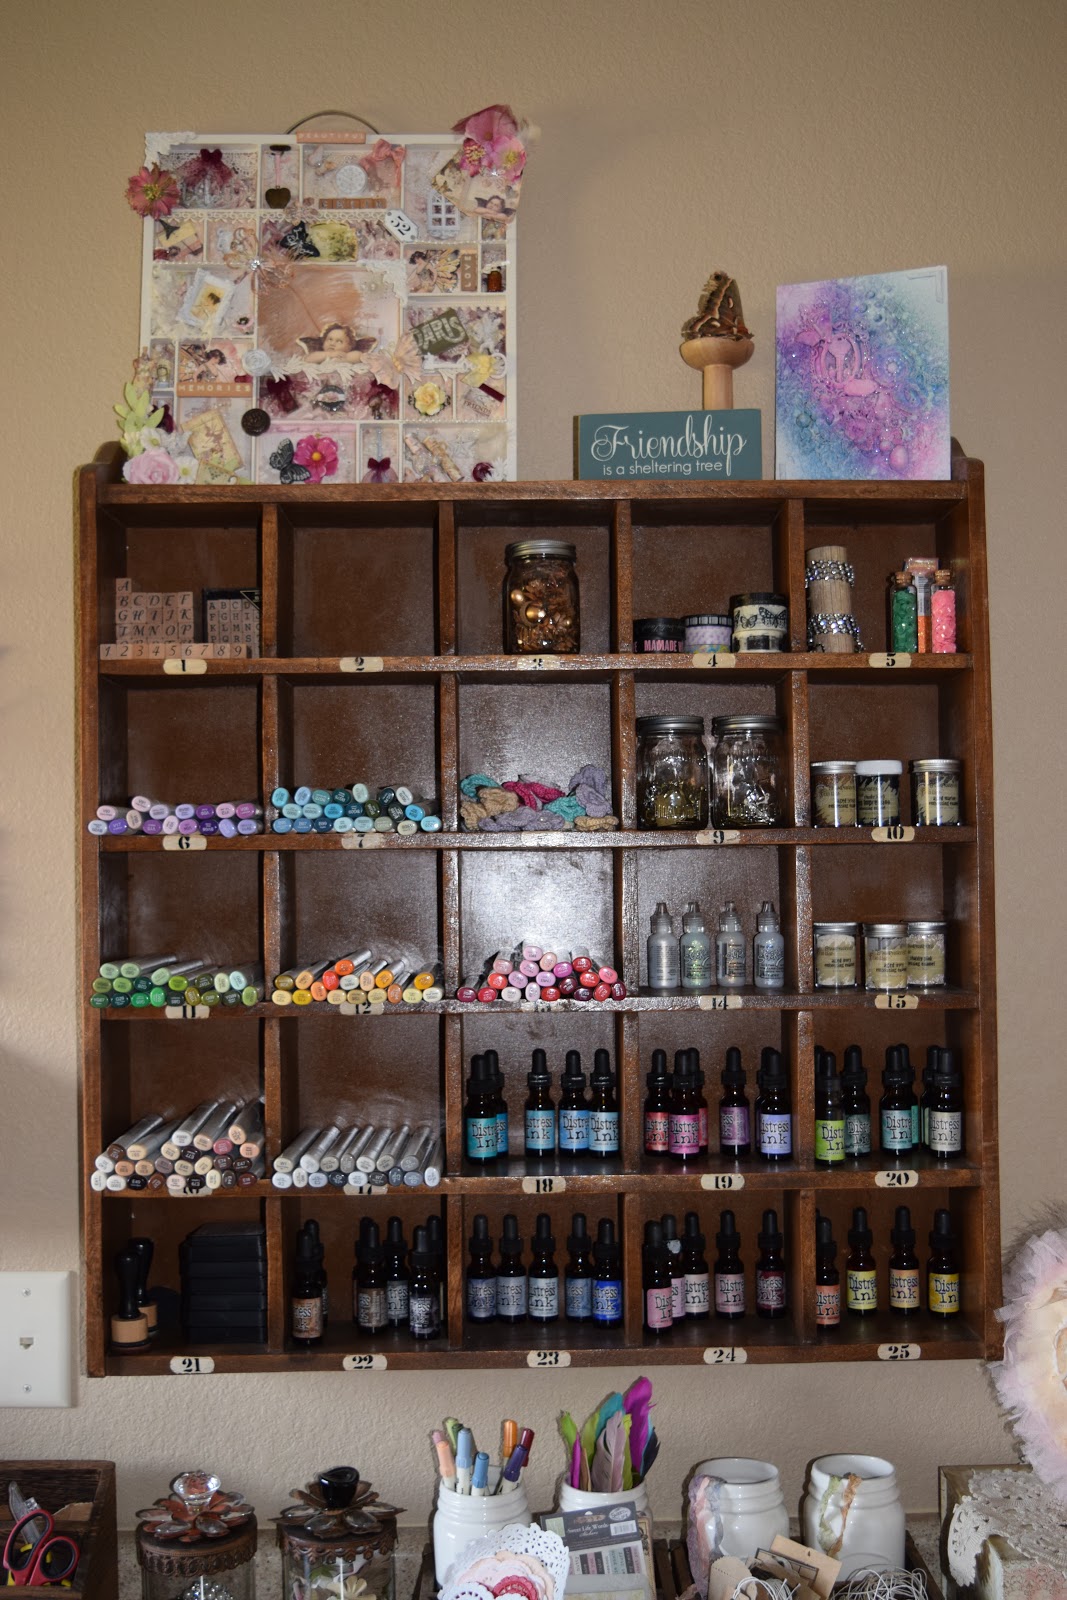
My gorgeous gifts from friends are display high on top so no one can destroy them, aka kids, cat.


My hubby made these small shelves for me from leftover trim off the kitchen cabinets. He hung them when I was not home to surprise me, lol The items below are for storage and display. The green bin is attached to the wire mesh, from Micheals. All my roses are in the bins.


The bin holds felt, cheesecloth, sequins, a tussie mussie from a friend and I lined them with doilies so nothing falls through.


I found this 3 tier metal stand recently at Hobby Lobby and filled it up with Mixed media things. So handy to grab and all the pretty colors look great too. 


Here are some pretty boxes from a friend with laces and ribbons in them. 


I purchased this wall storage from pottery barn, it was on sale but this was a bigger purchase that set the tone for the room.  It holds a lot of stuff and is so convenient for grabbing things right in front of where I work.


Here is a look from the window.


My husband loves the design so I can do laundry and cook while I craft, haha but yes I can multi task pretty good and accomplish more, that means more time in the craft room. lol

Thank you for stopping by my blog for a look, I would say this craft room is a minimal simplistic way to store crafts.  This way I am teaching myself not to over do and use what I have and a grateful reminder of the love of my friends.  I still struggle with not indulging on buying crafts but I just call my friend and its over, she has way more will power than I do, lol

Wishing you a beautiful day,
Kelly


Wednesday, October 21, 2015

Halloween Cupcake Box

Time to share all your Halloween Creations with us at Midweek Magnolias!
We have a new challenge for you with the theme "HALLOWEEN" at Midweek Magnolias Challenge Blog


I went to Micheals to buy the cupcake box, picks, and spider web doilies.  I love the doilies as they are so frilly and fun and I made them into web flowers. lol All I did  was crumple the ends together and glue dotted the ends to the box. They automatically frill into a flower shape.


Tilda with Peony Headband is nestled in a web waiting for someone to scare. lol She is too cute so she just compliments the cupcake.


Here is a better look at the doilies and cupcakes, we did eat these, lol so I plan on getting more for my sons' teacher and give her this box.


Please join us for MIDWEEK MAGNOLIAS Halloween Challenge and share your spooky creations with us!
Have a safe and fun Halloween!
Kelly

Tuesday, October 20, 2015

Spooktacular Fun at Magnolia Licious

We have a Spooktacular Challenge today at Magnolia-licious

"SPOOKTACULAR FUN"

My son loves Halloween and I have a couple of friends that love it too, they make gorgeous creations for a spooky Halloween feel.  My son helped me along with this one, make it scary mom! Well I have such a hard time with scary, I love cute so here is what I came up with. 


A tea light house transformed into a scary Halloween night.  I have two friends that wanted to see me get going on mixed media so they sent me boxes of goodies and this tea light house is one of them. Thank you Cathylynn and Christina for your generosity, you are both in my heart!


I painted the house black and used G45 paper to adorn the house. The roof line is glitter I glued on and I picked up some stickers from Micheals.  On the roof I glued cheesecloth so I have to use a battery operated light for it. 


I used @ Tilda from the World Wide Web Collection and colored her in Copic markers, I just cut off the @ from the bottom, looks like she is running for sure.


My fence is a Doohickey Die and the sweet cute Magnolia Dog is having a howling good time.


I hope you are brave enough to join the MAGNOLIA-LICIOUS CHALLENGE

SPOOKTACULAR FUN

We would love to hear from you so leave a comment
on the challenge blog or the DT blogs this
week for a chance to win a
surprise from Magnolia-licious.
My friend just won this a few weeks ago!  Good luck to you!


See you at the challenge and good luck to you all!
Hugs Kelly


Tuesday, October 13, 2015

My Kitchen is done!

I wanted to share my favorite room with you, my Kitchen!
We swapped rooms when we were re-building the house and now the kitchen is in the former living room.  We could not decide on a counter top for it so after 3 months of working with plywood I now have a finished kitchen.
We had to wait until we were almost done with the house to choose our countertop because we did not know if we should invest the money into Granite.  The cost of granite in Rapid City, SD is huge for our kitchen the bids were about $9,000.00.  Since my hubby travels to MN for work every other week, only 9 hours away, lol  He met with the Granite shop there and found this set of black countertops for only $4,000.00.  Still a lot of money but In SD they wanted $2,000.00 for Formica tops so we took the risk of splurging on Minnesota Granite.
Now how to get them here and install them, 2000 pounds of Granite is not easy.

We had a trailer big enough and the Granite company packed it onto their A-frame for us so it would arrive safe.  The small perimeter pieces were easy and my husband and 2 boys put them in when they arrived after a 9 hour drive. hehe love my hubby!  The next day, The big island weighing in at 1000 pounds was installed.  My boys and 1 other guy managed to perfectly place the 5 foot x 9 foot granite onto the island without a problem, well the new guy we had just met had a bloody finger, poor guy!


Carrying in the big island by sliding it along cardboard.
We had to kennel the dogs during this process.


Looked easy huh! I was closing my eyes as they lifted it and placed it on the cabinets. whew!


Here is the finished kitchen that I am so blessed to have.


We wanted casual everyday seating around the island and boy do we like this, just push your dish to the sink boys!


We have a sliding door to the back deck and the living room is on the other side of our basement steps.


the entrance to my craft room is just to the right, so I can craft and cook at the same time as long as I don't forget about the food, hahaha


I am so blessed by the talents my husband has and all that he has taught his children to get this house back together.


We have plenty of space now and I think I will start some mixed media projects on here too.


My husband is very practical and I love color so I chose Polish Pottery for cooking and serving. This is a new addiction for me, thanks Karen!  My older son Scott decided that I should have glass on the doors, I would have eventually gotten there! Scott wanted to do something nice for me and cut the 2 pieces of material to make the see through glass doors and siliconed it onto the doors.  I was so happy with his thoughtfulness he is also very talented to have around the house, my honey do list.


Thank you for stopping by today the craft room will be next on my blog some day soon.
Kelly

Wednesday, October 7, 2015

Midweek Magnolias CAS or Overloaded

I am a total overload if you haven't noticed! lol  I love lavish girly cards but yet smartly done not messy.  Sometimes my cards are overloaded and messy, but the one thing I admire about my friends is the CAS, how to do it and make it look awesome is not my gift. So you know who you are my CAS friends and I love your ability to make a simple design so gorgeous...I struggle with that.
Here is the newest Challenge  


I used Tilda with peony headband from the new BOHO collection and colored her in distressed ink.  She is available along with the rest of this awesome collection at Magnolia-licious Store.


The tulle goes behind and tucked into the Magnolia Doohickey dies and down the backside of the card.


I love the rolled Prima flowers and paired them with some stash I had.


I do not know the die cut for this pretty butterfly vine, I purchased it a while ago and took the label off sorry. I glittered the stem and cut out other butterflies for dimension. Also in the background on Tilda is Frantaged Boho lace, I really love the background that the lace and doily stamp creates for these sweeties.


I can hardly wait to see your cards, hopefully overloaded! lol
Please join us at Midweek Magnolias new challenge CAS or OVERLOADED!
Have a happy day!
Kelly